Travel

Futenma Shinto Shrine (普天滿宮)

Given the amount of time I’ve spent researching the history of Taiwan’s Japanese Colonial Era, most readers are likely to assume that my interest is based on a mutual love for both Taiwan and Japan. Admittedly though, after all these years living in Asia, I’ve been almost everywhere else but Japan.

Like most young people, I was always interested in Japanese stuff, so when I got to university and needed to take a foreign language credit, it was a no-brainer: I signed up for Japanese class. 

The thing is though, the class was over-booked and when I arrived on the first day, the classroom had a foul sour-like stench. 

The first thought that came to mind was: Oh no! I’m in a class full of Otaku!

When the professor walked into the classroom he said: This class is overbooked and there are more people here than there are seats. Would anyone like to transfer to Mandarin? There were few takers. Why study Chinese? Anime wasn’t made in China. 

I on the other hand, having a low tolerance for stink, raised my hand. The professor came over, presented me with a transfer sheet and I was on my way. 

The funny thing is that after studying Mandarin for a couple of years at school in Canada, I then took an opportunity to continue my studies at Peking University. After that I spent some time on exchange at Xiamen University before arriving here in Taiwan, where I’ve been for the last decade. 

Who knows where I’d be right now if I didn’t have such a low tolerance for stinky people. 

I haven’t been avoiding Japan all this time - I’ve always wanted to go, but I’ve also happy when presented with opportunities to backpack through South East Asia, India, Nepal and go island hopping in the Pacific. 

I figured that if I visited Japan that I’d fall in love with the place and every vacation after that would see me headed in the same direction. Coincidentally I think that already happened to my girlfriend, who has travelled to Japan a dozen times and speaks the language.  

So when she informed me that as part of my birthday present that we’d be heading to Okinawa for a week, I instantly got excited.

It would be my first taste of Japan and I couldn’t wait to check out all the cool Shinto shrines and Buddhist temples while stuffing my face with ramen and sushi. 

I was in for a bit of a rude awakening though.

Okinawa was actually nothing like I expected. Even though the islands are a part of Japan, they are in many ways quite ‘different’ from the rest of the country in terms of culture, language and religious practices - and for a lot of the people living there, being referred to as ‘Japanese’ is a contentious issue. 

When you do a bit of reading about the history of the Ryukyu islands, you’ll find that there are valid reasons for this. When the islands were annexed by the Empire of Japan, the Meiji government at the time did its best to suppress the ethnic identity, culture and language of the local people in an attempt to assimilate them into Japanese society.

These attempts were obviously not looked upon favourably by the locals and while these policies did a tremendous amount of damage to the local culture, the arrival of the Americans and the decimation of pretty much everything on the island put that to a stop.

In the ensuing decades under American occupation, the people of Okinawa were given the opportunity to revive their language and cultural identity while also working to completely rebuild and redevelop their home.

Unfortunately even though the Okinawa of today has been completely redeveloped and shows surprisingly little evidence of the war, the work to revive Ryukyuan language and culture remains a work in progress.

Interestingly, as Okinawa redeveloped, most of the buildings lost during the war that were considered ‘culturally’ or ‘religiously’ significant, especially those of Japanese origin, were never rebuilt. So, if you’re travelling to the islands hoping to find a bunch of temples or shrines, you’re likely to be disappointed.

It shouldn’t really be all that surprising though, Shintoism, the Japanese state religion was never really that popular with the Ryukyuan people, who preferred their native folk religion and ancestral worship.

Never fear though, you’ll still be able to find a couple of Shinto Shrines and Buddhist Temples to visit if you have your heart set on a cultural experience. 

There are a few things that you’ll have to keep in mind when it comes to Okinawa’s shrines and temples, which are essentially a lot like Okinawa itself - much different than the rest of Japan. 

The first thing you’ll need to keep in mind is that on the mainland there are more than 80,000 Shinto Shrines, with the majority of them being associated with a religious network of shrines.

In Okinawa however there are only eight shrines in total, referred to as the Ryukyu Eight Shrines (琉球八社) and the only thing they are associated with is a neighboring Buddhist temple.

Link: Ryukyu Eight Shrines 琉球八社 (Samurai Archives)  

Link: 琉球八社 (Wiki)

The lack of association with a network of shrines on the mainland essentially means that Okinawan shrines don’t receive much in terms of financial support and instead need to rely on the kindness of locals.

This isn’t entirely a terrible thing though as it has allowed the local people to take a bit of liberty with the architectural design of their shrines mixing in local Okinawan elements with traditional designs as well as allowing for the inclusion of more localized “kami” from Ryukyuan folk religion. 

Additionally, of the eight shrines that exist today, almost all of them are located in the greater Naha area - This means that the further you travel outside of the capital, the less likely you are to find a shrine or a temple, even in the few other larger populated areas. 

Today we’re going to be taking a look at the Futenma Shrine, one of the oldest and most important shrines in Okinawa, which just so happens to also be the largest and the prettiest of the bunch.

However, due to the length of this post (and the lack of in-depth English-language information available about the shrine), I’m going to be splitting it into two with this one focusing on the Shinto Shrine while the second post will focus on the Buddhist Temple located next door and information about how to get there.

Futenma Shinto Shrine (普天滿宮)

Dating back to the 14th Century, the Futenma Shinto Shrine has been a constant fixture of life in Okinawa for over six centuries. The shrine is considered to be the most important of the Eight Ryukyuan Shrines and over its long history, it has become a favorite among the locals and the (former) royal family.

Considering that it is one of the most important shrines in the whole of Okinawa, it shouldn’t be a surprise that every year on the first day of the Lunar New Year over 100,000 people walk through the main gate of the shrine to look for new year blessings. On every other day of the year though, you’ll find that the shrine is busy with locals visiting to pray for help finding love and having children. Likewise businesses will often make ‘official’ visits to make offerings looking to receive a divine blessing for prosperity and success. 

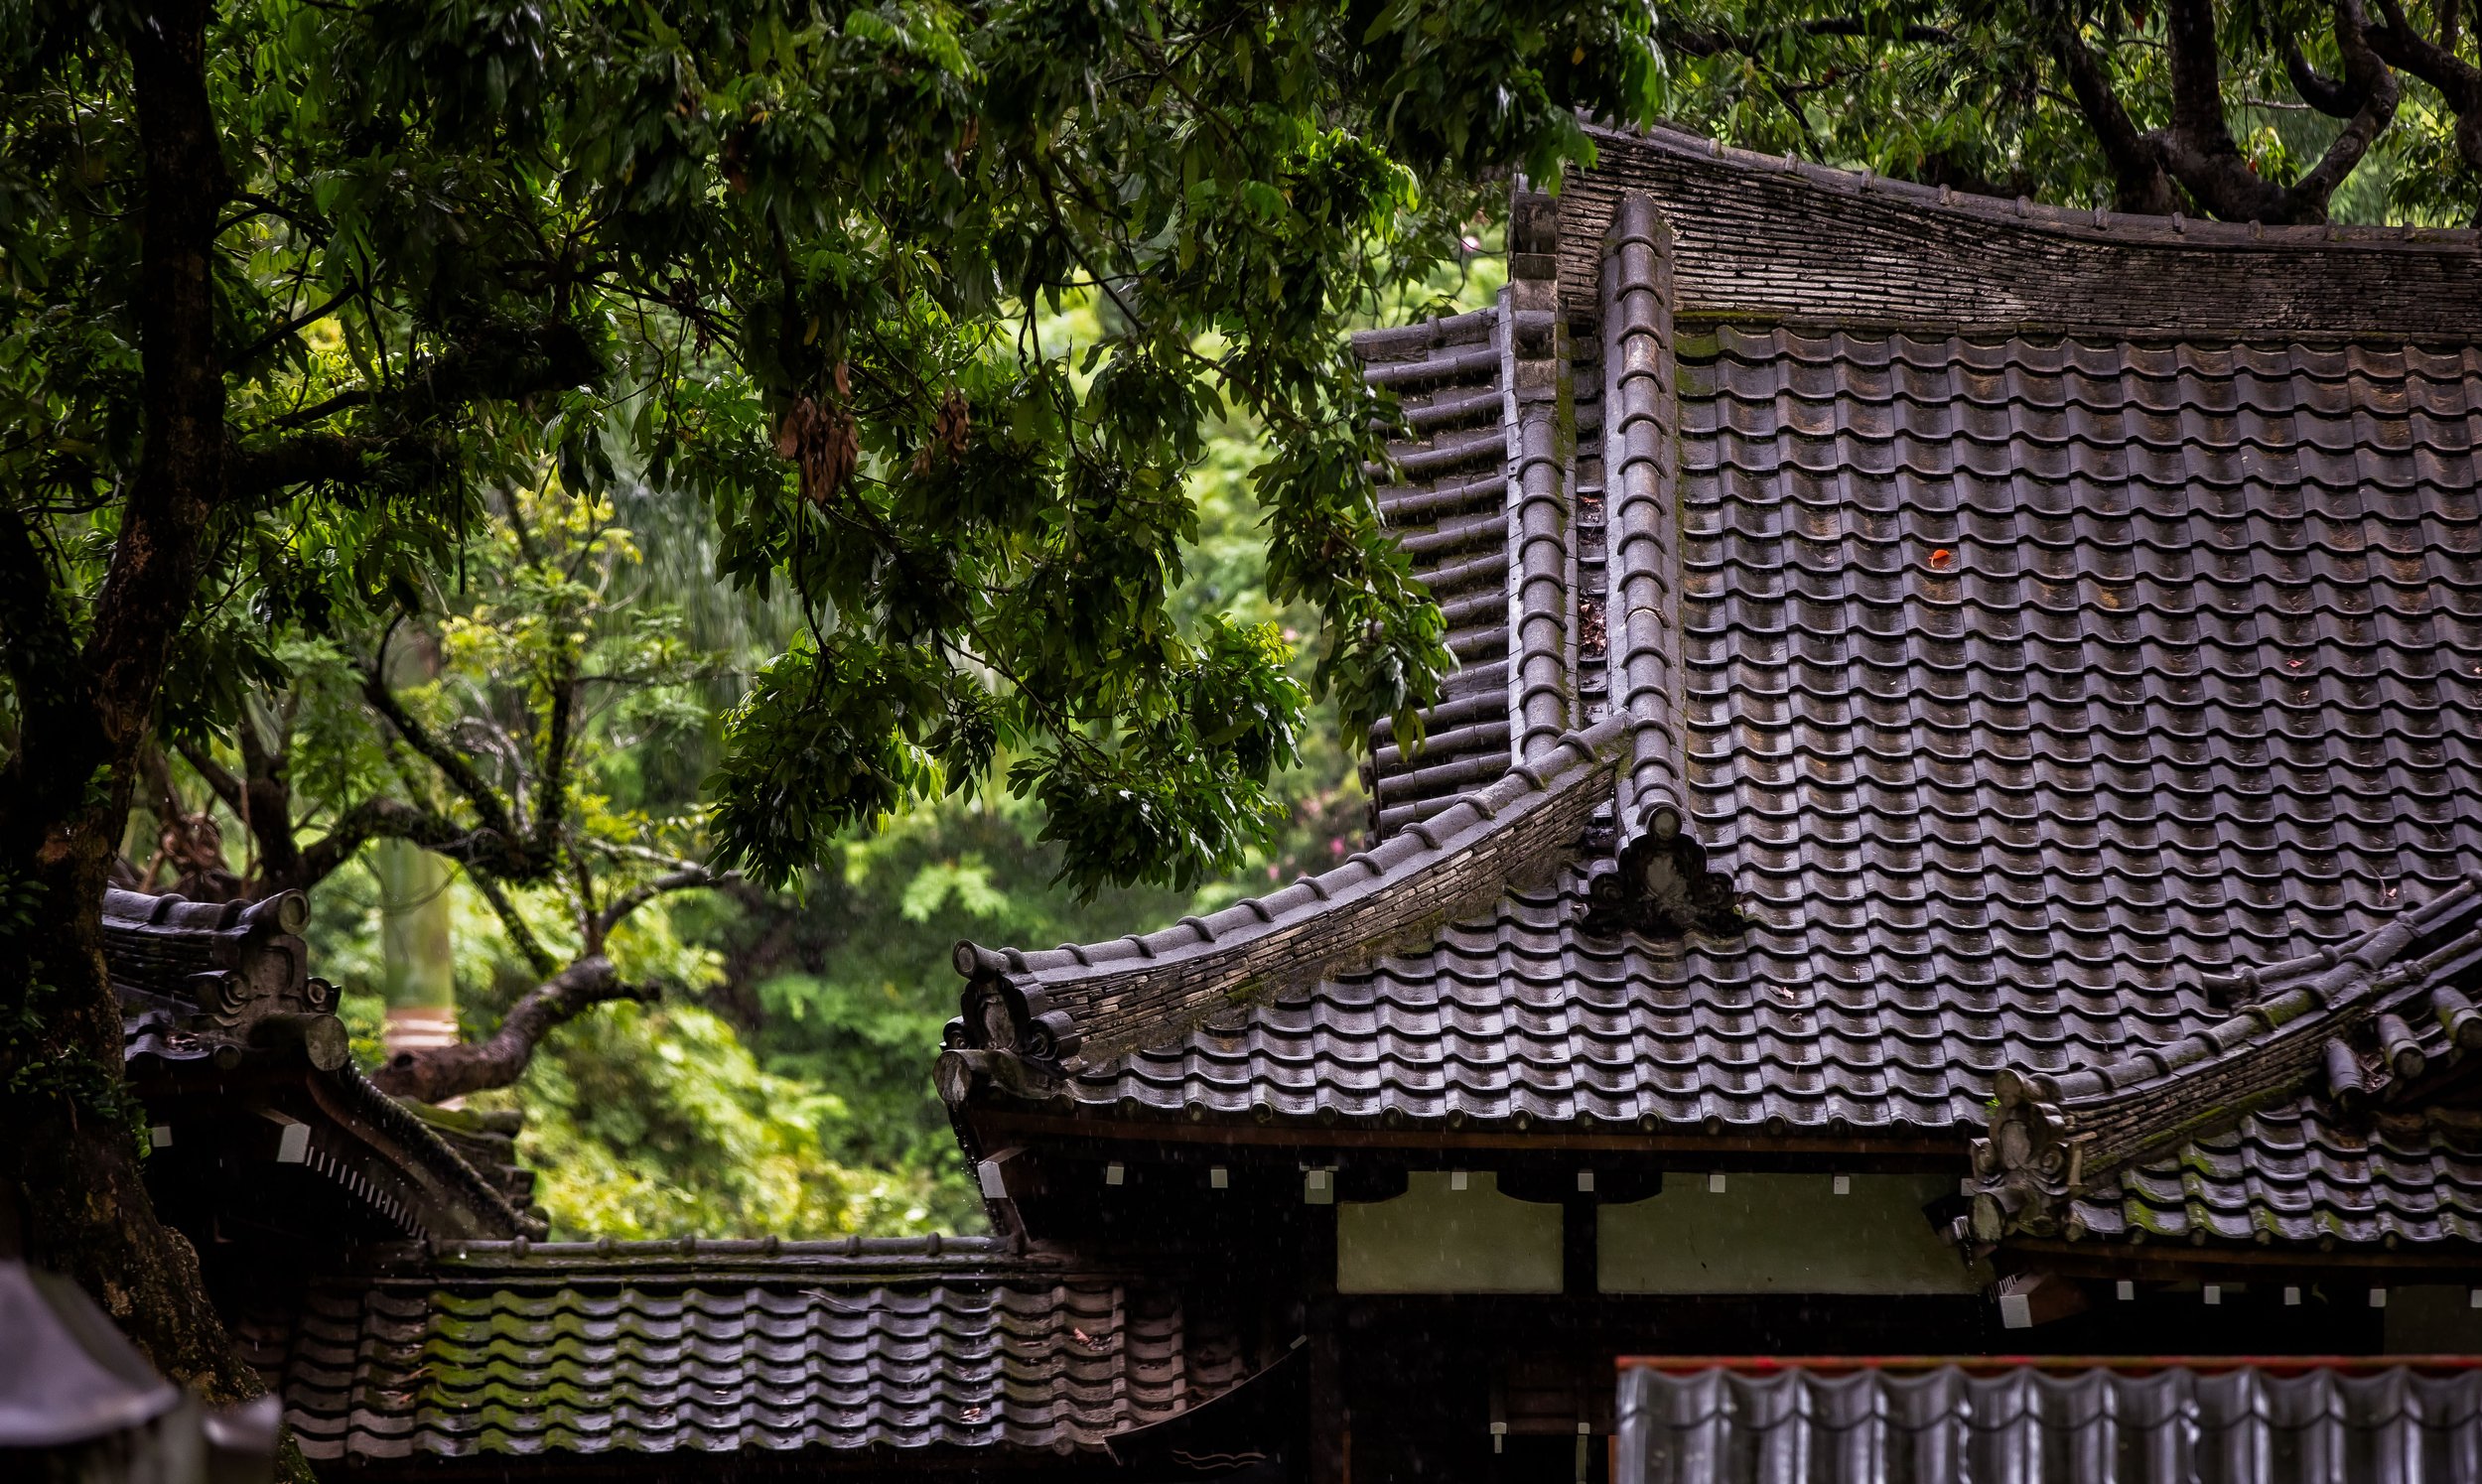
If you’re visiting the shrine hoping to see a six hundred year old place of worship, you’re going to be a bit disappointed - The shrine that we see today was rebuilt in 2005 and looks pristine. If you’ve visited Japan though, what you should be able to respect about this shrine is its subtle differences from what has become the norm on the mainland. Futenma, and the others found in Okinawa follow tradition but they also make sure to add a bit of Okinawan charm to their design making the shrines stand out from what you may be used to.

Before we get into any of that though, let’s start by explaining the legends that were responsible for the construction of a shrine on this site in the first place:

The first legend tells of a young woman named “Megami,” (普天満女神) who despite being one of the most beautiful women in the area was pious and devout and instead of spending time with men, she spent her time locked in her room dedicating herself to spiritual pursuits. When her younger sister married, her husband’s curiosity one day got the best of him and he wanted to find out if Megami was really as beautiful as people said she was. When he took a sneak peak, she caught him, turned hysterical, left home and disappeared into the cave never to be seen again.

The next legend tells of a local couple who in order to survive worked several jobs - In particular the wife would walk every day from the Ginowan area to Shuri Castle where she worked as a royal maid. Every day after work on her long walk home she would stop in the area to pray. A popular Shinto deity named Kumano (熊野権現) took note of this and one day appeared to the woman as an old hermit and requested that she take care of a wrapped package for him. After several years the man hadn’t returned to take the package, but each day the wife would return to the same place hoping to find him. One day on her way home she stopped to pray and the god appeared to her and told her to open the package which was filled with gold making them wealthy and prosperous. 

Even though the legends are a bit strange, through them we can better understand why Futenma Shrine has become such a popular place for local people who visit wishing to find love by the grace of Megami, now known as the “Futenma Goddess”, or good fortune thanks to Kumano.

Futenma Cave(普天滿宮洞穴)

The Futenma Cave, where it all started, is a 280 meter long limestone cave filled with stalagmite. Even though the cave is quite large, visitors are only able to access a front section that is about 50 meters in length while the rest of the cave is off limits to guests.

If you want to check out the cave, it is free of charge, but you’ll have to wait for one of the guided tours to take place. To sign up, simply walk in the door to the left of the main shrine, sign your name on the book and then patiently wait in the nicely air-conditioned room for someone from the temple to open the door to bring you in. 

When you enter the cave, you will be led by one of the Miko’s (巫女) who will request that you follow the rules and refrain from taking photos inside the sacred area. While doing research for this post, I discovered that quite a few people didn’t bother to pay attention to that request and took photos anyway.

Admittedly, it would have been quite easy to take photos while inside as they’re not exactly chasing you around or keeping much of an eye on you, but I followed the rules and didn’t take any photos.

It may not be your religion or your culture, but it is still important to remain respectful of the local customs when you’re traveling. 

The interior of the cave is quite impressive with large stalagmites and stalactites protruding from the roof of the cave and a small shrine nestled in among the rocks. The shrine, dedicated to one of the two gods found on the grounds is housed within a hokora (神庫), which you are only able to view from a distance. 

The area is well-lit but you’ll also find quite a bit of natural sunlight entering the cave from some holes in the ceiling. While inside you’re free to walk around a bit, but there isn’t really that much to see, so your visit probably won’t take any longer than ten minutes.

The significant thing about the cave is that archaeologists have found quite a few interesting artifacts inside that tell of the history of the area - Some of those finds are put on display in a glass case near at the entrance of the cave.  

History

Starting from humble origins, the Futenma Shrine that we see today was initially just a simple cave shrine where locals would come and pay homage to the cave lady.

A royal visit in the mid-15th Century by King Sho Taikyu (尚泰久王), who was well known for his patronage of Buddhism, cemented that from that time on, a much larger shrine would exist on the site. 

Even though the temple is almost six hundred years old, its history hasn’t been well documented and if you’ve done any research about it you’ll find that certain dates and events aren’t really that well recorded. It also goes without saying that the shrine has had to be rebuilt on several different occasions, with two of those rebuilds happening within the last century. So even though the shrine is steeped in tradition and history, the actual structures that you see both above and below ground are all relatively new.

I’m not going to spend a lot of time going over every fine detail of the shrine’s long history, but below I’m going to provide a list of important dates that I think better explain some of the important events that happened over the past few hundred years. 

  • 1450 (15世紀中半) - King Sho Taikyu (尚泰久王) orders the construction of a shrine at the site of the Futenma Cave as it has become a popular place of worship among locals.

  • 1868 (明治元年) - The Japanese government institutes a policy known as “Shinbutsu Bunri” (神仏分離) which orders the complete separation of Shinto from Buddhism, which were previously amalgamated and often inseparable. The policy also promoted Shintoism as the state religion and is remembered as a failed attempt to destroy the ‘foreign’ influence of Buddhism in Japan and its colonies. 

  • 1871 (明治4年) - The Meiji Government institutes a shrine ranking system and Futenma is classified as a “Mukakusha Shrine” (無格社) meaning that it is legally recognized but unassociated with the network of shrines on the mainland. 

  • 1945 (昭和20年) - The Shrine is destroyed during the Battle of Okinawa. 

  • 1953 (昭和28年) - Reconstruction of the Cave Shrine (奧宮) is completed.

  • 1963 (昭和38年) - Reconstruction of the Haiden (拝殿) is completed.

  • 1968 (昭和43年) - Reconstruction of the Honden (本殿) is completed.  

  • 1969 - 1970 (昭和43年-44年) - As is tradition with Kumano (熊野権現) worship, in order to receive the kami into your shrine, it first has to be ‘divided’ through a process known as ‘bunrei’ (分霊) or ‘kanjo’ (勧請) from a shrine at another location. A year of celebrations take place in order for Futenma Shrine to receive a new Kumano from the sacred Kumano Sanzan (熊野三山) mountains just south of Nara (奈良).  

  • 1973 (昭和48年) - The Shrine officially registers as a Religious Organization after Okinawa’s return to Japanese Control.  

  • 2004 (平成16年) - At the turn of the century, the shrine is in a bit of a state of disrepair due to years of typhoon and earthquake damage so a complete reconstruction of the shrine becomes necessary and is completed in 2005. 


The Shrine Gate (鳥居)

The gate to the shrine is known in Japan as a "Torii" gate, which simply translated into English as a ‘bird perch’. These gates are typically found at the entrance of a shrine and their purpose is to demarcate the transition from the outside profane realm to that of a sacred one. This means that once you pass through the gate, it is time to stop joking around and to be respectful. 

The Torii at Futenma is known as a Myojin torii (明神鳥居) which is one of the most common styles of Torii design and simply means that its upper beam is curved while the lower beam is straight.

Between the two beams you may notice a faded plaque that indicates the name of the shrine and reads “Futenma Shrine” (普天間宮). 

Hung from the lower beam of the gate you’ll notice something known as the “sacred rope” or the “shimenawa” (標縄). The rope is thick and expertly braided and is decorated with “shide” (紙垂), which are beautifully cut paper streamers that are used in Shinto rituals. These sacred ropes are found all over Japan and have many different uses but here at the Shinto shrine it is used to help ward away evil spirits 

Visiting Path (參道)

The “Sando” (參道) or “Visiting Path” is a common feature with Japanese Shinto and Buddhist places of worship and act as a path that leads to the Hall of Worship. The length of the path tends to vary between shrine with some being quite short while others can be several kilometers long. 

The path at the Futenma Shrine is quite short and is simply a set of cement stairs with stone lanterns on either side that opens up to the Purification Fountain on the left and the Hall of Worship just ahead. 

 Purification Fountain (手水舍)

An important aspect of Shintoism is something known as the "sacred-profane dichotomy". In terms of this temple, the Torii gate at the entrance of a temple separates the world of the 'sin' from that of the 'sacred'. When you walk through the gate you are leaving the world of the profane which means that you should do so in the cleanest possible manner. So in order to ready yourself for entrance into the sacred realm you would have to do so with a purified body and mind. 

As you approach the “chozuya” you’ll notice a handy sign next to it indicating the proper method of purifying yourself with a ceremony known as “temizu” (手水). The simple ceremony includes a few gestures that you’ll probably want to take part in if not just as a sign of respect, but because its hot in Okinawa and washing yourself with cold water is quite refreshing. 

  1. Pick up a ladle with your right hand, fill it with water and clean your left hand. 

  2. Swap the ladle to your left hand and then wash your right hand. 

  3. Swap hands again and pour some water into your left hand and take a drink. 

  4. Wash your left hand again and then tilt the ladle vertically so that the remaining water runs down the handle. 

Administration Office (社務所)

The “Shamusho” (社務所) is directly behind the Purification Fountain and reaches almost as far as the Hall of Worship. The building is traditionally used to conduct the business of running the shrine and also acts as a place to allow the shrine personnel to rest. The building is also where you’ll go if the shrine is holding a lecture or if the priests are holding special events or prayer ceremonies that aren’t held in the Hall of Worship. 

Traditionally the Shamusho is also where you’d go to purchase good luck charms, amulets, ema, etc. from the shrine, but at this particular shrine, they have that area directly connected to the Hall of Worship where you’ll find the young Miko priestesses working at a public counter where they not only sell the charms but also coordinate the cave tours with tourists. 

I suppose the main reason for the separation of the Administration Office and the Public Counter in this case is largely due to the noise created by tourists waiting around for cave tours. The separation allows the priests to hang out in the administration office or give lectures without constantly being disturbed. 

Stone Guardians (狛犬) 

Shinto Shrines and temples in Japan are traditionally guarded by stone lion-dogs known as “Komainu” (狛犬). Thought to have originated in Korea, usage of these stone lion-dogs has become ubiquitous with places of worship throughout almost every country in Asia where they typically appear in front of a temple and are meant to help ward off evil spirits.

Okinawa being Okinawa though, the traditional stone lion-dogs that guard the shrine have been replaced with the Shisa (シーサー), or “shi-shi” (獅子) in the local language. The Shisa lions, I guess you could say are a distant cousin of the Komainu and are prevalent throughout the Ryukyuan islands acting as not only the guardians of temples and shrines, but also homes and businesses as well. 

The Shisa first appeared in Okinawa in the 15th Century and in the years since the lion has transformed into an image that symbolises the cultural identity of the people of the Ryukyuan islands and there are many legends in the area that tell of how they arrived.   

Link: Shisa: The Guardian Lions of Okinawa (Kampai) 

Hall of Worship (拜殿)

For most visitors, the Hall of Worship or the “Haiden” is the main attraction of a visit to the shrine and is the place where most of the local people will head once they’ve finished at the purification fountain.

From a distance, the Hall of Worship is extremely picturesque and the closer you get the more you’re able to fully enjoy the finer details of its design. Specifically, there are quite a few elements of the halls design where you’re going to notice strikingly distinct differences from what is the norm on the mainland. 

The first major difference is that that the shrine was constructed using a combination of cement and wood. My original impression was that they took some shortcuts with the construction of the shrine, but would later find out that I was mistaken. The reason for this combination is quite simple - Okinawa is constantly under the threat of typhoons making landfall during the summer. In fact, the shrine was was reconstructed in the late 1960s had to be completely replaced less than four decades later due to damage caused by extreme weather. So when they rebuilt the shrine again in 2004, they made sure to construct it in a way that kept with tradition, but also hoping that it could last a bit longer this time.

Another local contribution to the shrine is the Okinawan limestone that was used to construct steps and the elevated walkway that leads up to the front door of the hall and around the sides.  

The biggest difference however is the beautiful red tiled roof that has become quite synonymous with the architecture found on the islands. The red tiles, known as “Aka-Gawara” (沖繩赤瓦) are created using a black soil found in the south of Okinawa which in addition to the elaborate firing process produces the distinct colors.

The combination of the red tiles and the beautiful blue Okinawan sky makes the shrine shine in the sunlight and at the same time makes some of the shrines on the mainland look a bit dull. 

Link: Ryukyuan Architecture in Zamami: Red Tile Roofs (The Zamami Times)

Most of what you’re going to want to see from the Hall of Worship is on the exterior, but if you’d really like to walk up to the doors to take a peak inside, you’re going to want to follow tradition and first follow a few steps which will impress the locals. 

First you’ll want to walk up the steps to the wooden box in front of the main doors. You can drop in a small donation (there’s no set amount), then clap your hands twice to alert the Kami of your presence, then with your hands clasped together, bow your head and make a wish. When you’re done, its tradition to bow. From there you can approach the glass windows at the main door and take a peak inside of the shrine room to see whats happening. 

The interior is rather simple with a shrine in the middle and a mirror placed on top of it. There are meditation cushions lined up in front of the shrine and there is a drum to the right. The interior doesn’t really have much going on, so if you peak inside try not to take too long because others might be there wanting to pray and you may be blocking their line of sight with the kami enshrined inside. 

Main Hall (本殿) 

The Main Hall or the “Honden” (本殿) is the literal beating heart of any Shinto Shrine and is where the kami is enshrined. It is a space that is considered so sacred that it is off-limits to anyone other than the priests who reside at the shrine. Contrast to what you’ll find at a Buddhist temple, where the statues of Buddha’s are situated within a shrine and are easily approached, in a shrine like this, a “kami” is only ever placed within a Honden and is physically represented in the Hall of Worship by a mirror. 

The Honden is located directly behind the Hall of Worship and can be reached only by walking through one of the two sliding doors in the hall and then up a set of stairs to the small shrine.

Even though the area is off limits, when you take a tour of the cave, you’ll be able to check it out from the entrance to the cave. It is located on a small hill on top of the cave at the rear of the Hall of Worship. 

In the second part part of this post I will introduce the beautiful Futenma Buddhist Temple which sits directly next to tis shrine as well as pertinent travel information that you’ll need to make your way to the shrine. When I’ve posted the second part, I’ll update here with a link. I hope this post helps travelers understand this beautiful shrine a bit more than the scattered bits of information you’re able to find elsewhere on the net.

If you’re visiting Okinawa, I highly recommend stopping by this beautiful shrine.

Futenma Temple (普天間山神宮寺)


Thumb Mountain To 9-5 Peak (拇指山 - 九五峰)

So, you’ve hiked Elephant Mountain, you’ve got your epic travel selfie and some beautiful pictures of the city. Now what? Are you going to head back down the trail and onto your next destination? Or are you going to keep following the trail to see what you’ll discover? 

If you’re like most tourists, you’re probably coming to enjoy the view from the peak of Elephant Mountain and then you’ll head back down to ground level without ever really questioning what amazing things are waiting to be discovered further up the trail. 

If you ask me, thats quite unfortunate. 

So, I’ll let you in on a little secret - You should keep hiking. 

With a little more time and effort you’ll be rewarded with the opportunity to enjoy the view of the city from a couple more mountain peaks and will have the chance to take some beautiful photos of the cityscape while you’re at it. 

The topic of today’s post, if you haven’t already figured it out, is Thumb Mountain (拇指山) and what is known as 9-5 Peak (九五峰), two mountain vistas that are a short distance from Elephant Mountain and are an absolute delight to visit, if you give them a chance. 

The two peaks are located within the same network of trails known as “Four Beasts Hiking Trail” (四獸山) which also includes Elephant Mountain, Tiger Mountain, Leopard Mountain and Lion Mountain. Thumb Mountain and 9-5 Peak however are located at the highest portion of the trail and tower above all the others.

One of the great things about this network of trails is the way that they are set up allowing you to easily summit several different mountain peaks, with only a small amount of time and effort. The trails are also really well-developed, well-marked, well-lit at night and also provide hikers with washroom and water filling stations at various points throughout the hike. 

So, if you’ve hiked Elephant Mountain and feel like continuing along the trail, I’ll share another secret with you - You’ve already hiked the most difficult part of the trail. If you decide to continue hiking to Thumb Mountain and 9-5 Peak, you’ll be able to enjoy a leisurely walk through a beautiful Taiwanese tropical forest and will be rewarded with even better views of the beautiful Taipei cityscape. 

Thumb Mountain (拇指山)

Measuring at 320 meters in height, Thumb Mountain is one of the highest points on the Nangang Mountain range. While standing on top of its beautiful rock face however, you’d be hard pressed to care about that as it is the only peak on the trail that actually gives off the impression that you’re on the peak of a mountain. 

So why is it called “Thumb Mountain?” 

Well that’s simple, because it (apparently) looks like a thumb.

I suppose when you’re walking up the smooth rock face to the peak of the mountain, you could imagine that you’re walking up the back of someone’s thumb, but when it comes to seeing images in rock formations, I’m lacking in imagination. I suppose I might feel differently if I was flying a drone and saw it from above but I’m not here to argue about that.

Considering how well-marked the network of trails is, it is a bit strange that when you arrive at the entrance to Thumb Mountain, there isn’t a sign that points you in in the direction of the peak.

I recall that there used to be a sign, so I asked one of the experienced hikers on the trail what happened to it and they explained that a typhoon blew it away and it has yet to be replaced. This probably means that that a lot of people have been passing by the peak without even noticing. 

The trail to the top of Thumb Mountain is an off-shoot from the main trail and if you’re like most people you may end up walking past the entrance if you’re not playing close attention. 

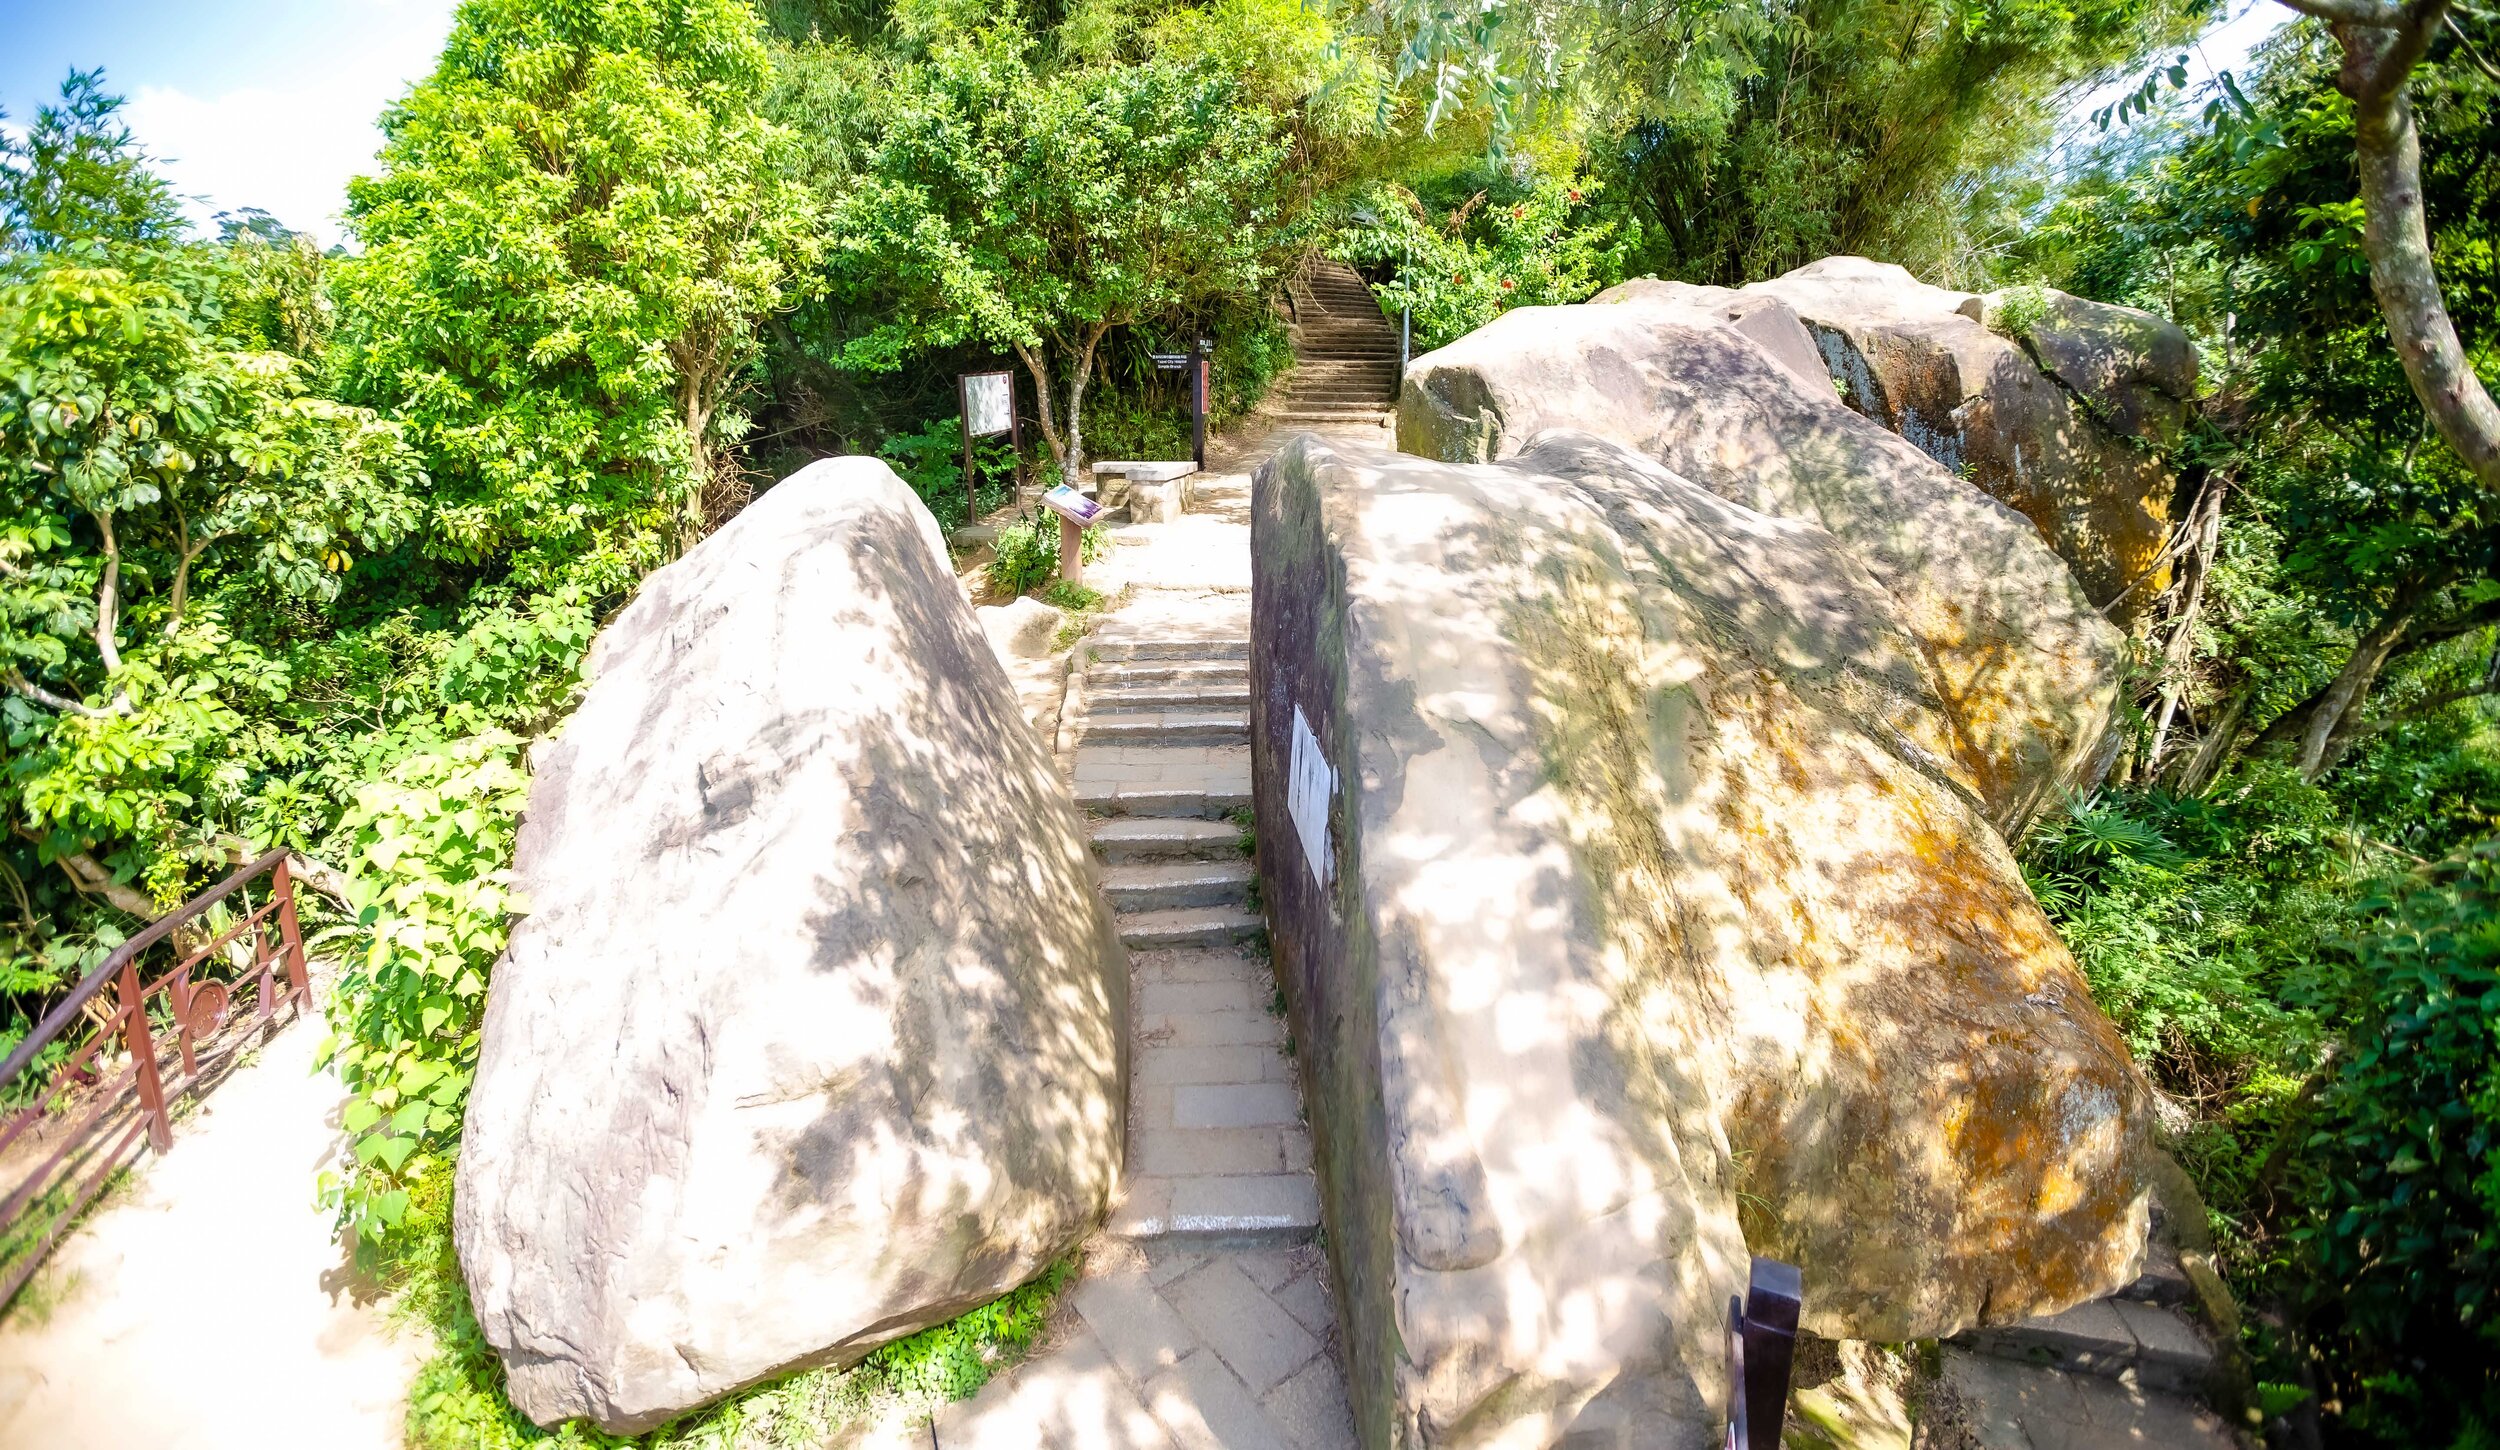
The best way to know if you’ve passed the entrance to the trail without noticing it is if you’ve arrived at a shrine that has been constructed within a rocky part of mountain face. The shrine is actually constructed at the trail level of the rocky Thumb Mountain crag and if you’re walking by you can’t miss it. 

So, if you’re looking at the gods and goddesses, you’re going to have to backtrack until you reach a small clearing in the trail where you’ll find a set of stairs. As you walk up the trail to the mountain, you’ll notice that there are ropes fashioned to the side of the trail that are meant to help you safely get to the top.

Even though the trail isn’t that difficult to walk up, you’ll probably want to hold on just in case, especially when you’re on your way down as the trail can be a bit damp at certain times of the day.

From the trail to the peak of Thumb Mountain you’ll need little more than two or three minutes. 

As I mentioned above, the peak of Thumb Mountain is a rocky mountain face that is probably the most ‘peak-like’ experience you’re going to have on any of the mountains on the trail. The rocks are easy to walk up and once you get to the top there is a marker that indicates you’re on the peak of Thumb Mountain with the official height of the mountain.  

One of my favourite things about Thumb Mountain is that when you’re standing on top, you’re going to have beautiful 360 degree views of the Taipei cityscape as well as the Muzha district to your rear. You may even be able to see the Maokong Gondola in the distance if the weather is clear.

If you’re visiting on a hot day though, you are going to be completely exposed to the sun, so if you want to sit there for a bit to relax, you’re going to need to remember to protect yourself with a hat and sun screen. It also tends to be quite windy on the peak, so you’ll want to be careful when you’re walking around. 

The view from Thumb Mountain looks directly down at the city with only Elephant Mountain sitting between you and the cityscape. You should be able to take some really nice photos from here, but if you’re visiting on a hazy day, you might feel a bit disappointed as it could be difficult to get a clear photo.

Even if the weather seems really nice, if you are planning on hiking all the way to Thumb Mountain and 9-5 Peak, I recommend first checking the current Air Quality index which should give you an idea of how your photos will turn out.

Link: Air Pollution in Taiwan: Real-time Air Quality Index Visual Map

Nangang Mountain (南港山)

If you’re thinking, “Isn’t this blog titled Thumb Mountain and 9-5 Peak? Why is he talking about Nangang Mountain now?”, you’d be making a good point. But the truth is, if you’re hiking to both Thumb Mountain and 9-5 Peak, you’re going to pass by the peak of Nangang Mountain - whether you realize it or not. 

I always thought it was a little weird - “Nangang Mountain” (南港山) is the name for the mountain where you’ll find Elephant Mountain and Tiger Mountain but why are they referred to as mountains in both Chinese and English? Are they mountains or simply different peaks? 

The answer is simple, Nangang Mountain is the name of the mountain, which consists of several different peaks. The “peaks” started being referred to as “mountains” when the hiking trail became popular and people started realizing that the views of the city were beautiful.

GTJ-2019-0914-67.jpg

So is there such a thing as Elephant Mountain? Not really. Should it be renamed to Elephant Peak (象山峰)?

Nah. I don’t think so. Elephant Mountain sounds better.

The peak of Nangang Mountain receives little fanfare, mostly because there’s not really very much to see when you’re there. There’s just a simple marker on one side and a crane-like machine on the other. If you take a picture at the peak of Nangang Mountain, your friends and family on social media aren’t going to get very excited, because there isn’t really anything worth taking a photo of - its just a marker without a view.

And this is why we continue on to 9-5 Peak, where the view is fantastic.

9-5 Peak (九五峰)

For many years 9-5 Peak was an area of the trail that only experienced climbers would attempt to reach. Now though, people of all types can reach Nangang Mountain’s highest point through the well-developed network of trails.

At a height of 375 meters, 9-5 Peak offers visitors one of the best views in the whole city from its lookout. 

In the past, if you wanted to reach 9-5 Peak, you would have to scale up the dangerous mountain side making use of ropes that were fashioned to the rocks. Not only was this too difficult for most people, it also caused quite a few accidents and injuries.

In 2014 for example, a young women lost her grip, fell a hundred meters and died. 

While the ropes still exist and you can still try your hand at using them to climb up the mountain, the city government has made the whole process a lot easier by connecting trails on several different sides of the mountain that allow you to reach the peak. There are currently warning signs that caution hikers of the danger of climbing the mountain side and it seems like the local government is in the process of removing them entirely. 

You might be wondering why all the other peaks on the mountains have relatively normal names while this one is oddly named 9-5 Peak - The name is surprisingly fitting and is meant to pay homepage to an avid hiker who (several decades ago) successfully climbed the mountain at the age of 95.

The name 9-5 Peak (九五峰) is dedicated to Mr. Yang Sen (楊森) who to the surprise of many was able to successfully climb to the peak of Nangang Mountain. Given the difficultly of hiking the mountain several decades ago, it was considered quite a feat for a man of his age to complete the hike, so they renamed the peak in his honour. 

The peak is famously home to a giant rock that people often climb on top of to take photos. The front side of the rock features the Chinese characters “九五峰” etched into the side indicating that you’ve reached the highest point of the mountain. 

The reason why I think the name of the peak continues to be fitting is because the majority of the people you’re going to find on the peak are the elderly retirees of Taipei who hike the trail on a daily basis for a bit of exercise and to meet up with their friends.

When you’ve arrived at the peak, you’ll probably notice that there is a sense of community up there with most of the people stopping to have a chat with their fellow hikers, who are people they see almost on weekly or daily basis.

When I first hiked to the peak over a decade ago, sitting on top of the rock, especially at night provided excellent, even romantic views of the city. Today though, the view from the top of the rock has mostly been obscured by trees and brush that has grown a little too high.

You would think that with such a great view that people would want the trees obscuring the view to be removed, but that isn’t really the Taiwan way. People here wouldn’t support the natural environment being destroyed for something as unimportant as an epic view of the cityscape.

Thankfully, there is an even better lookout a short distance away from the peak where you’re afforded panoramic shots of the Taipei cityscape high above the rest of the mountain range. The 9-5 Peak Lookout is probably the best photo-taking spot on the whole trail and hiking the extra hour or so that it takes to get there is well worth the effort thanks to the spectacular photos you’ll come away with.

Getting There

Route Map for Thumb Mountain and 9-5 peak www.goteamjosh.com/blog/thumbnine

How you get to these two peaks really depends on where you’re starting your hike - In this case, we’re spoiled with several different options, so when you’re planning your hike, your most important consideration is going to be what route you want to take and what you want to see along the way. 

I may just be guessing here, but I would assume most short-term tourists are likely to start on the Elephant Mountain side, while local people or long-term travellers (like myself) are more likely to start on the Tiger Mountain side. 

There are pros and cons to each of these starting points, so let me introduce the different routes you can take and the walking method for each. 

Route 1 - Elephant Mountain - 9-5 Peak

What is likely to be the most popular route for tourists is to start hiking at the Elephant Mountain trailhead, completing that trail and then making your way from there to Thumb Mountain and then onto 9-5 Peak. This route might seem like it is the most convenient due to the fact that its close to an MRT station and allows you to first enjoy the beauty of Elephant Mountain.

You will however have to deal with a much steeper climb as well as a much more crowded trail for the first section of the hike.

If you’re a short-term tourist visiting Taipei, hiking this route combines a visit to Elephant Mountain and allows you to travel a bit further than most other tourists do. 

The thing is though, I’m not exaggerating when I say that the Elephant Mountain trail is quite steep and there is a section of the route that takes you to Thumb Mountain that is also quite steep.

There are better options if you’re worried about wearing yourself out on the hike.

Route 2 - Tiger Mountain - Thumb Mountain

Another option would be to take the MRT to either Houshanpi Station (後山埤捷運站) or Yongchun Station (永春捷運站) and walk to the Tiger Mountain (虎山) trailhead. From there you’ll continue your hike from the peak of Tiger Mountain to 9-5 and Thumb Mountain and then leaving from Elephant Mountain.

If you elect to take this route, you’re in for a much easier hike with a fraction of the traffic on the trail and you’ll also get to enjoy the beautiful view from Tiger Mountain as well! 

This route requires a 10-15 minute walk from the MRT station to the trailhead but you’ll save time on the actual trail as the distance to 9-5 and Thumb Mountain is much shorter than the route from Elephant Mountain. 

There are several different trailheads for Tiger Mountain, but the closest and easiest to get to from the MRT station or by Youbike are the two trailheads on Songshan Road (松山路). You’ll find them both on the map above.

Route 3 - Songshan Cihui Temple - Thumb Mountain 

Let’s say you’re a pro and you’ve hiked Elephant Mountain and Tiger Mountain a bunch of times and have little interest in hiking them again. Can you still hike to these two mountains while avoiding the others? Sure. You’ll have to keep in mind though that even though there are a number of trails in this mountain network, they all eventually meet up at some point and allow easy access to all the other peaks. 

If you prefer to hike this route, simply take the MRT to either Houshanpi Station (後山埤捷運站) or Yongchun Station (永春捷運站) and then make your way to the beautiful Songshan Cihui Temple (松山慈惠宮) where you’ll find the trailhead at the rear of the building. 

This route will take you around Tiger Mountain and directly to 9-5 Peak where you’ll be able to continue along the trail passing by the peak of Nangang Mountain (南港山) before arriving at Thumb Mountain (拇指山). From there you can either leave the way you came or head down the mountain passing by Elephant Mountain and finishing at the Xiangshan MRT station.

If you want to save a bit of time walking, you could also take one of the various buses that travel through the area. If you take the bus, get off at the Fengtian Temple (奉天宮) stop and then walk up the hill to the temple from there.

If you need info on bus stops or real time info, check the Taipei eBus website for more information. You may also want to download the “台北等公車” smart phone app which uses GPS to let you map your route more easily.

Buses that serve the Fengtian Temple Stop: #46, #88, #207, #257, #286, BL10.

Something that I’ve always questioned in regard to the majority of tourists hiking Elephant Mountain is whether they were only hiking the mountain for a selfie halfway up or if they were just completely unaware of the existence of Thumb Mountain and 9-5 Peak. I suppose you can’t blame most people, these two peaks aren’t really all that well advertised, and thats a shame.

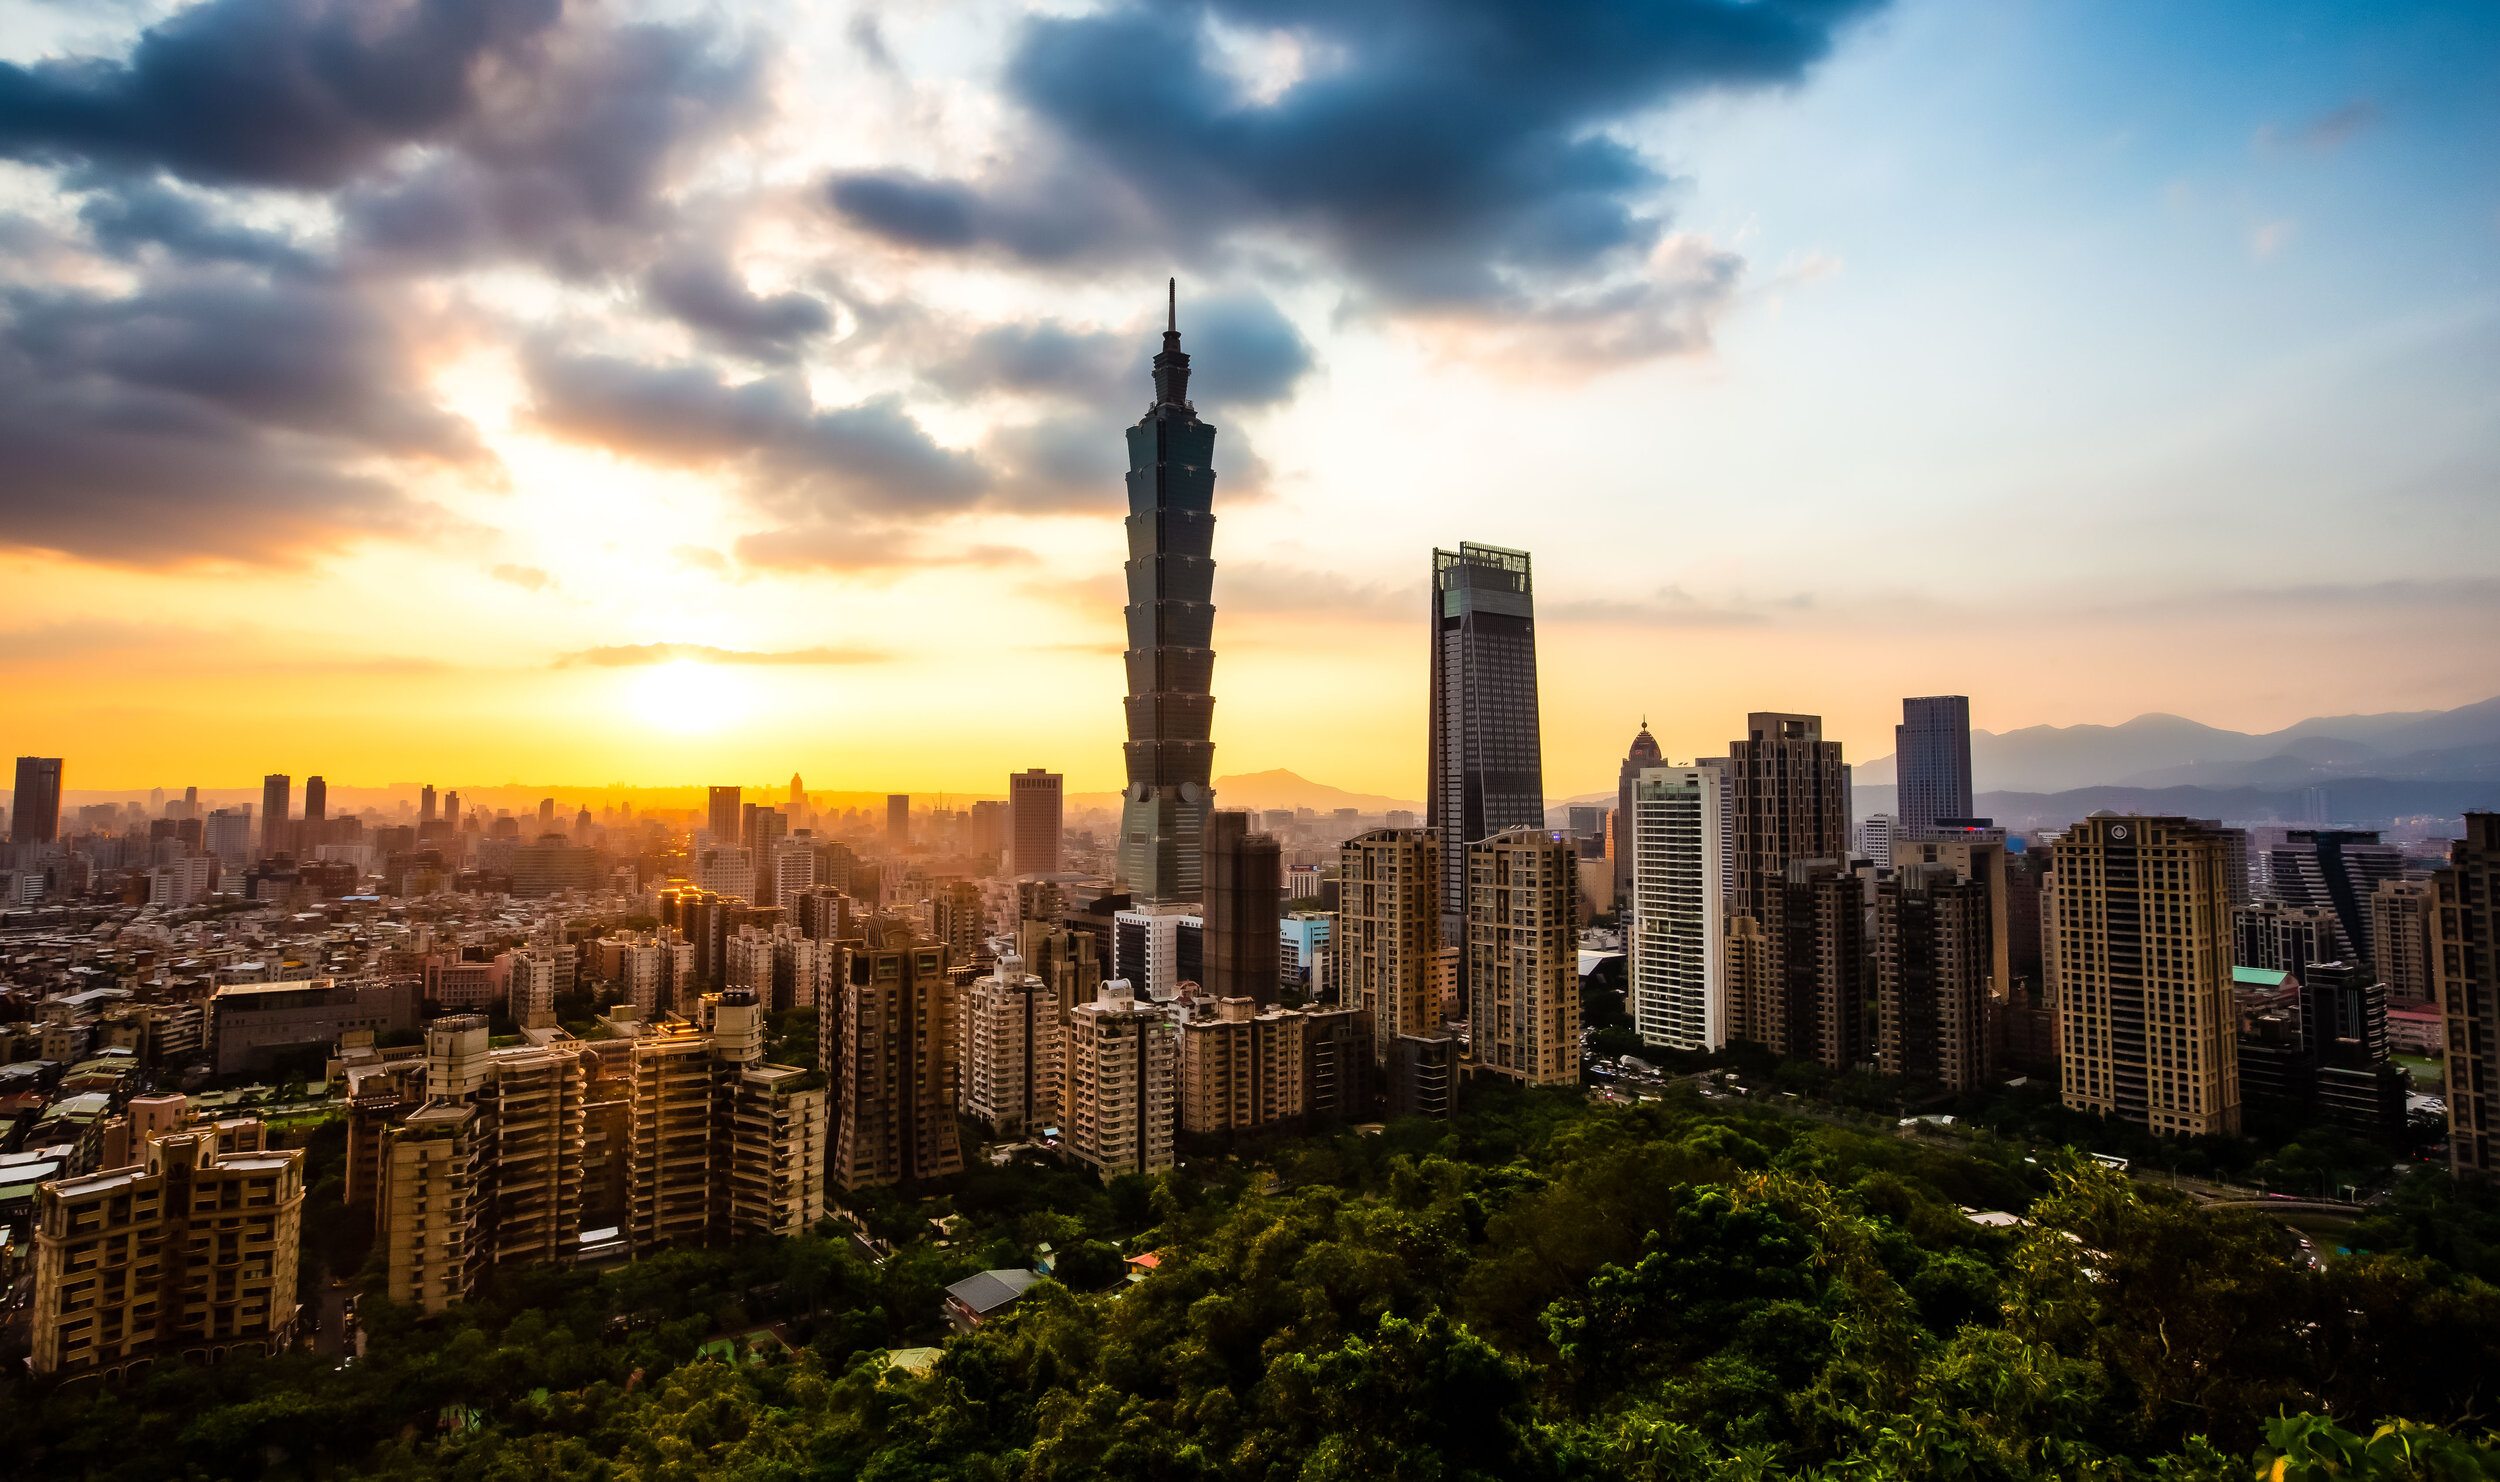
I would contend that one of the best photo locations for a cityscape shop is at the lookout on 9-5 Peak - It gives you the widest perspective of the city that you’re going to get and is an absolutely beautiful spot to enjoy the sunset.

So my advice to you is simple, if you’re going to hike Elephant Mountain and the weather is great, why not take another hour to hike to these two peaks as well? You’re going to enjoy yourself along the path, you’ll get some great photos along the way and you’ll have travelled further than 98% of your fellow tourists.

There’s nothing wrong with taking the road less travelled.


Elephant Mountain (象山步道)

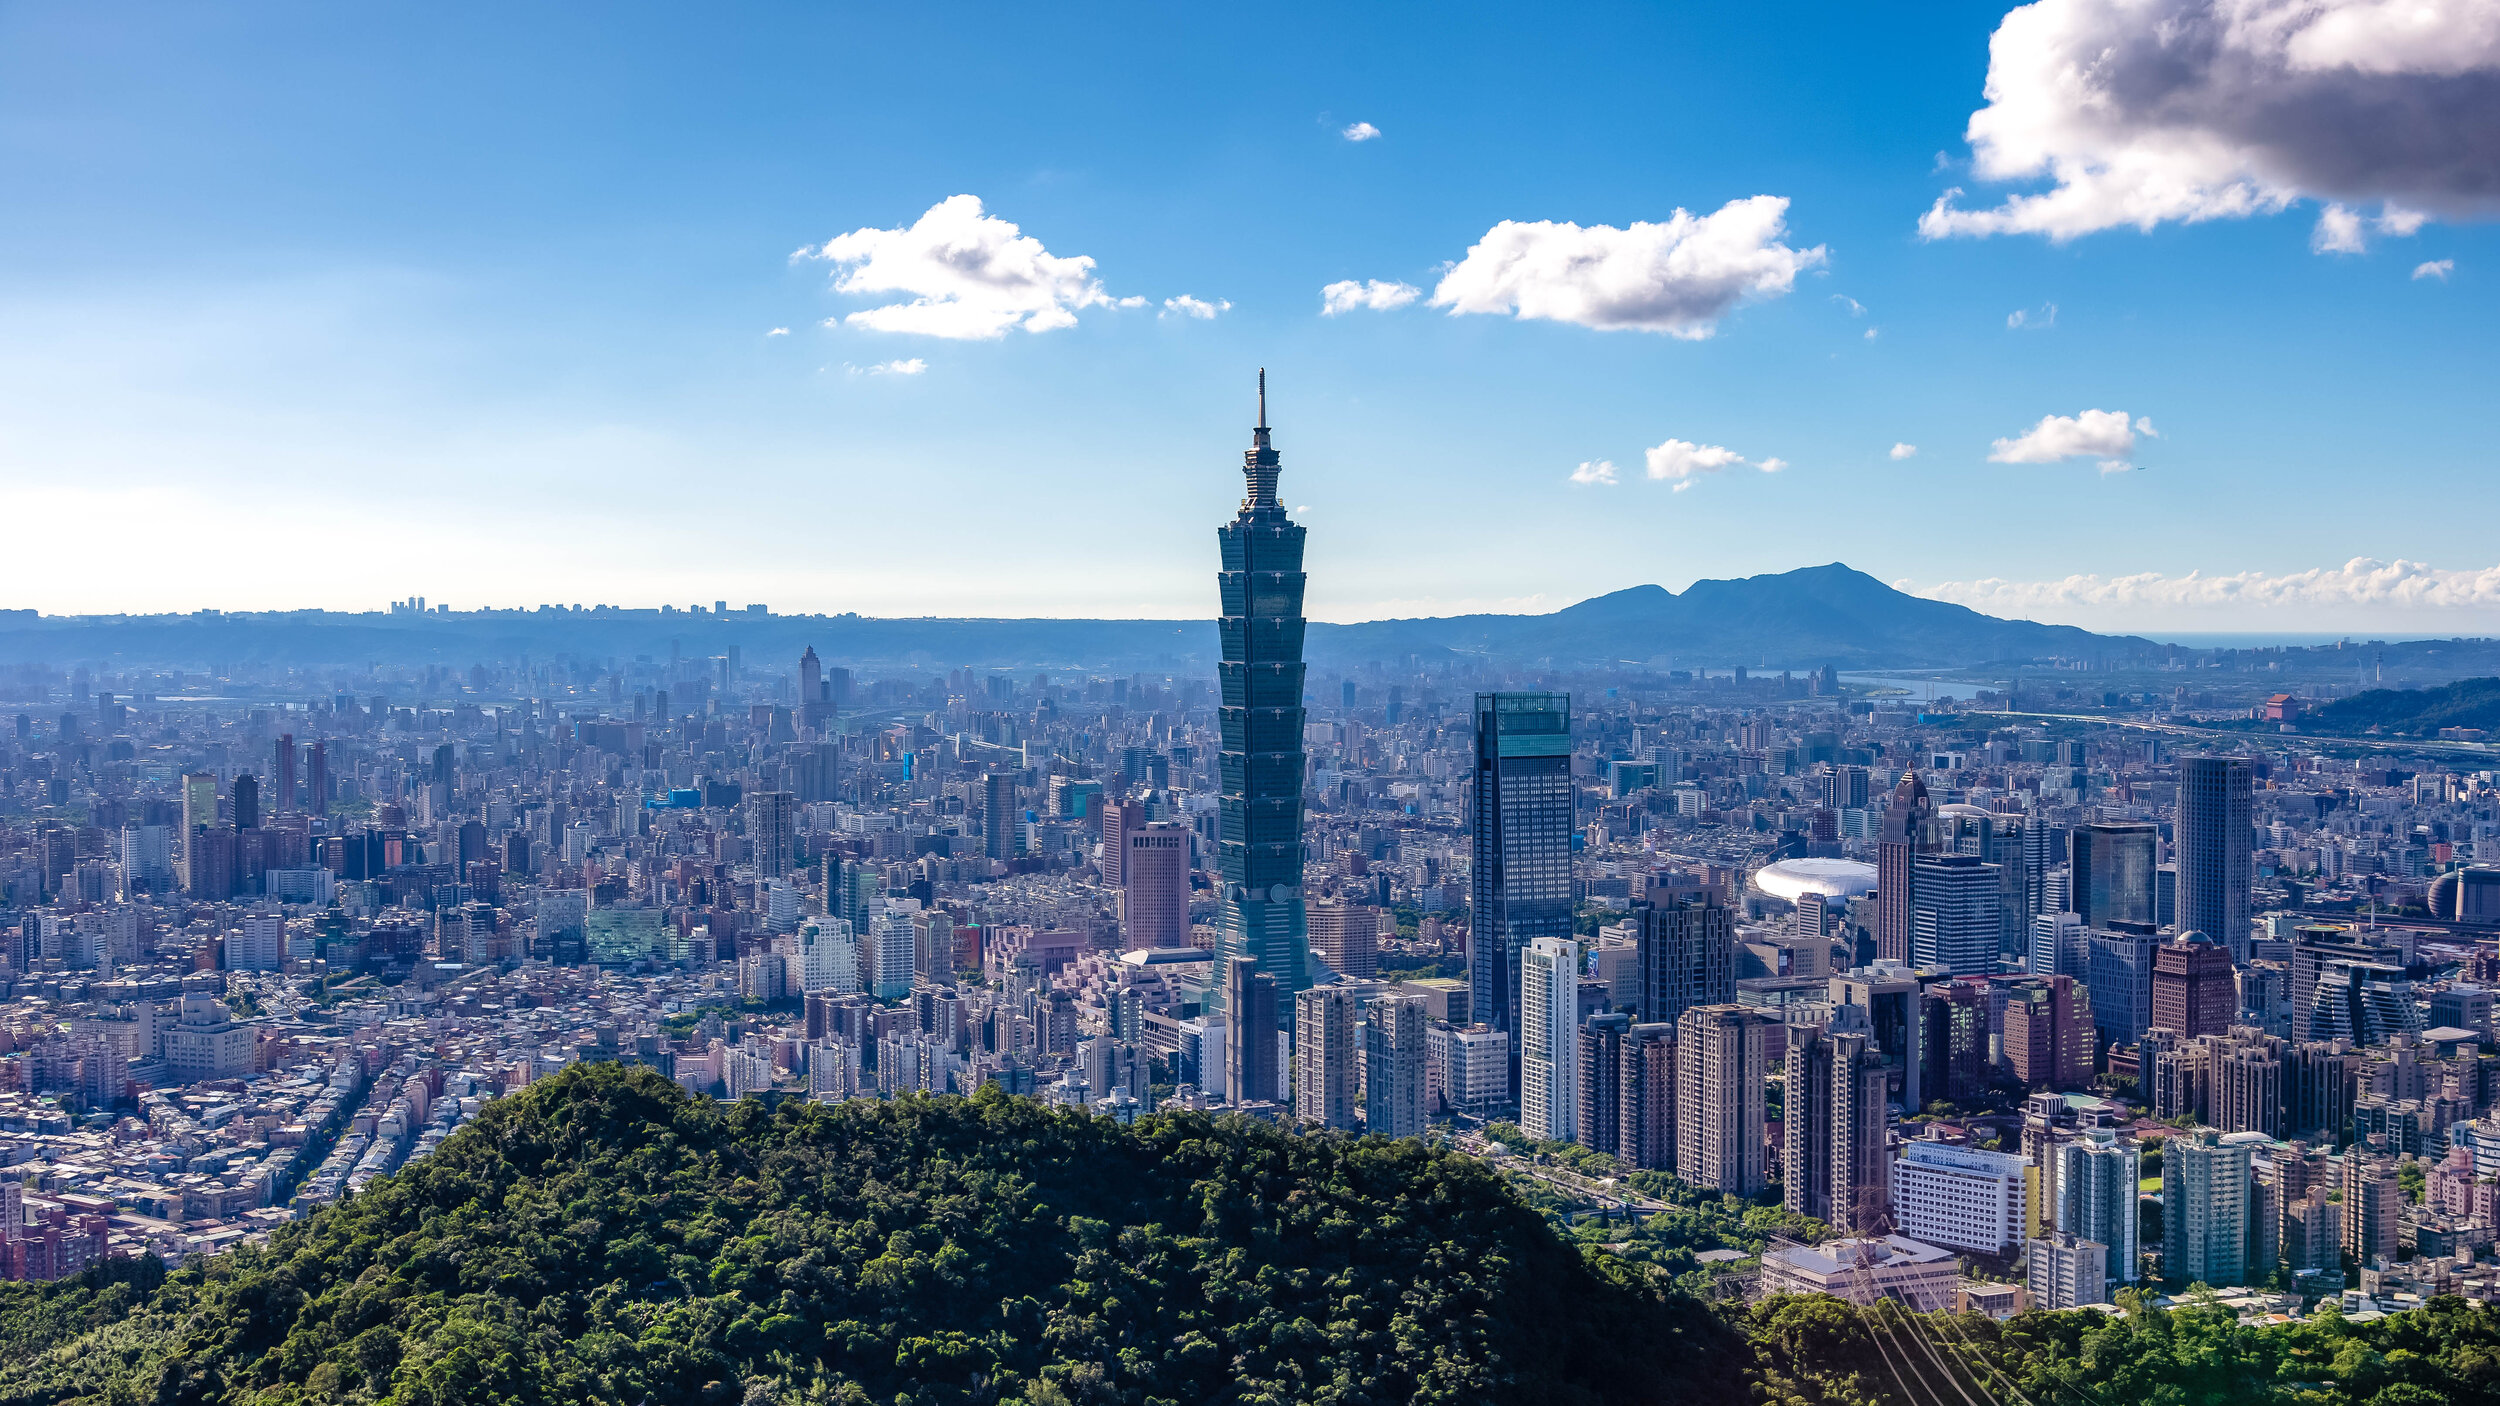
So you’re sitting at your computer, you’re planning a trip to Taiwan and you’re wondering what you’re going to do while you’re here. You type ‘T-a-i-p-e-i’ into Google and what comes up? My bet is that you’re going to get a collection of photos that look more or less the same as the photo above.

This shouldn’t surprise you. 

Taipei is a city with an endless amount of things to see and do - but its fair to say that the undisputed champion of the city’s tourist attractions is the Elephant Mountain Hiking Trail. This is why each and every day hundreds, if not thousands of photos are posted from the many popular photo spots on the trail.

You’re of course welcome to disagree with my assessment, but before you do, I recommend taking some time to hike the mountain and taking note of the amazing mixture of languages being spoken by all of the travelers on the trail. You’re not likely to have an even remotely similar experience anywhere else in Taiwan (at least not in such a high concentration) as you will on Elephant Mountain. 

Even though I’m not a big fan of crowds slowing me down when I’m hiking, I can appreciate the fact that the mountain has become so popular and has played a part in helping so many people from different areas of the world realize that Taiwan is a great place to visit.

It goes without saying that the popularity of the mountain does have its downsides - Namely that it doesn’t matter when you visit, you’re going to be hiking the trail with hundreds of other people. You’re also probably going to have to stand in line at the top to get your cool-looking tourist photo. You’re also going to have to arrive quite early to reserve a spot if you’re wanting to take ‘professional’ style shots of the sunset or the view at night.

If this kind of stuff worries you, never fear, there are quite a few other options for mountain trails in Taipei where you’re able to take beautiful cityscape photos. 

If you’re a short-term visitor though, I can’t recommend enough that you deal with the crowds, hike the mountain and enjoy the experience - I’ve hiked the mountain a hundred times over the years, and even though it has gotten progressively busier, it rarely disappoints. 

Before I start, I’d like to take a minute to explain why I’m writing about this mountain for the second time.

When I first started this blog, I honestly didn’t really have any idea about what direction it would take. I figured I would use it as an outlet to showcase my photography and the beauty of Taiwan, but never could have imagined that it would become such a popular travel resource for people wanting to learn more about Taiwan.

Now that I’m much more experienced with this whole blogging thing, when I look back at some of the articles I wrote when I first started, I feel a bit embarrassed - especially with those that attract a lot of traffic. My Elephant Mountain article in particular is one where I felt like I needed to provide an update and offer much more in-depth information to travelers. 

I hope this updated version helps travelers and answers any questions you may have about hiking this beautiful trail. 

The Elephant Mountain Hiking Trail

Benches designed in the shape of the Chinese characters for Elephant Mountain.

Most tourists seem to be unaware that the Elephant Mountain Hiking Trail (象山登山步道) is essentially just a small section of the much larger network of trails known either as the ‘Four Beasts trail’ (四獸山步道) or the Nangang Mountain Hiking Trail (南港山系). 

The 7km long network of trails also includes Tiger Mountain (虎山), Leopard Mountain (豹山), Lion Mountain (獅山), Thumb Mountain (拇指山), Nangang Mountain (南港山) and 9-5 Peak (九五峰) - all of which provide excellent views of the Taipei cityscape and takes several hours to complete.  

The Elephant Mountain portion of the trail however is just a short hike up a very well-developed set of stairs that should only take you anywhere between fifteen and twenty minutes. Don’t let this fool you though, I’ve seen people showing up in high-heels and their Sunday best thinking that it is going to be quick and easy. 

This mountain trail is steep and even an avid hiker like myself gets a pretty good workout every time I go.

You’re not going to need to wear hiking boots or bring a bunch of gear with you when you go. You’re just going to have to wear comfortable footwear and clothes that are suitable for a bit of exercise.

From the trailhead, you’re going to hike on a very steep incline that will quickly transport you well above the city to a height of about 183 meters (600 feet) above sea level. 

Elephant Mountain Trailhead

The trail is well-developed with a stone path, signage, benches for taking breaks, lights that guide your path at night, water fountains and surprisingly clean washroom facilities. This allows you to not only hike the trail during the day, but also at night without having to worry. 

While there are several cityscape viewing platforms along the way, the main attraction of the trail for most tourists is the area known as the ‘Six Giant Rocks’ (六巨石) near the peak of the mountain. The giant rocks are part of an open space near the peak where you’re going to enjoy the best selfie opportunities, but is also where you’re going to encounter the largest amount of traffic.

Having your photo taken at the rocks is probably the most important part of hiking the trail, so it shouldn’t surprise you that you may end up having to wait in line to get your chance to stand on the rock and take your photos. So if there is a line, its just something that you’re going to have to be patient about if you want to get a photo of yourself.

My advice would be to hike the mountain early in the morning which should save you some time as the mountain isn’t as busy then.

If you’re a solo traveller and are hiking the mountain alone, I recommend requesting a fellow traveller to help you take a photo while standing on the rock rather than simply taking a selfie. If on the other hand you have others traveling with you, you can take turns by having them stand on one of the giant rocks to the rear to take photos of you.

This way you’ll get a bit more perspective when you take your photo and you’ll also save you some time waiting in line if you work together.

Once you’ve finished getting photos at the Giant Rocks area, if you’re not too tired and would like to get some more photos, I recommend continuing your hike a bit further past the Giant Rocks where you’ll come across several other viewing platforms that provide excellent perspectives of the city.

If you hike further up past the rocks, you can choose to complete your hike by returning the way you came, or simply continuing along to Tiger Mountain where you’ll descend upon another MRT station. 

Personally, I prefer to exit through Tiger Mountain for a couple of different reasons - It is a short distance from Elephant Mountain’s final platform, it also allows me to experience another mountain peak, there is less traffic, and more importantly, its much easier on the knees.

How you leave though depends on you, if you missed some platforms on your way up, you’ll probably want to revisit them, so if thats the case you’ll probably just want to head back the way you came.  

Elephant Mountain Photo Spots

Night view of the Taipei cityscape from Elephant Mountain.

When it comes to taking photos of the Taipei cityscape, you’re spoiled for options on Elephant Mountain - There are at least five different vistas for taking photos that provide tourists with an elevated platform giving an even better perspective of the city. 

So when you’re visiting Elephant Mountain, you simply have to ask yourself: What kind of photos do I want to take?

Do you want to take epic travel photos/selfies? Do you want to take professional quality photos of the cityscape? Do you want to take photos of the sunset or the night view? Or are you hoping to get photos of the New Years fireworks? 

Once you’ve decided what you’d like to do, there are a few considerations that you’ll want to keep in mind: 

  1. If you’re hoping to take photos of yourself, you’re probably going to have to wait in line to get up on the giant rock. You should also bring a photo-taking pal who can take turns with you. 

  2. If you’re wanting to take professional quality photos of the cityscape, you’re going to need a camera, possibly a tripod and a spot on one of the platforms where you can set up. 

  3. If you’re hoping to take photos of the sunset, you’re going to have to arrive early, bring a camera and a tripod and wait. Spots on the platforms fill up quickly, so if you don’t want to miss out, you’ll have to arrive several hours early. 

  4. If you’re hoping to take photos of the New Years fireworks, you should probably prepare a tent and camp out for a few days in order to reserve your spot. You may think I’m exaggerating but some of the old guys in Taiwan will have their tripods chained up in spots on the platform several days before New Years and they take turns standing guard. 

Elephant Mountain Photography Platforms

There are a number of platforms and viewpoints located on the mountain where you’re able to take some pretty awesome photos, but even though the signage on the trail is surprisingly helpful, its not easy for tourists to plan their trip in advance with all the scattered information available online.

I’m embedding a map below that includes the location of all the popular photo locations and the routes you’ll take to get there as well as a short description of each of the stops below.

Guide to hiking Taipei's Elephant Mountain (象山) www.goteamjosh.com/blog/xiangshan

  • Photographers Platform (攝手平台)

GTJ-2019-0914-5.jpg

The trail to the ‘Six Giant Rocks’ can more or less be divided into two sections, the first part is a 5-10 minute walk up a very steep set of stairs and the second part is another 5 minute walk up an even steeper set of stairs. Fortunately the space between the two sections is a flat section of trail where you’ll be able to catch your breath and take a break. 

The first viewing platform, the ‘Photographers Platform (攝手平台) sits along this flat piece of land and is an elevated structure that allows hikers the opportunity to take photos of the cityscape. This platform is often full of people so if you want to take photos from here, you’re probably going to have to be patient to get a spot.

Personally I feel like it is a nice spot to stop for a selfie, but its not one of my preferred spots for setting up a tripod and taking photos. I think what this platform does well though is give hikers a pretty good taste of what they’re about to experience as they hike further up the mountain.

  • Fireworks Viewing Platform (煙火平台)

The amazing view of the under-appreciated Fireworks Viewing Platform.

Once you’ve passed the first platform, you have the choice of either hiking up the hill to the ‘Six Giant Rocks’ or continuing straight along the flat path. Most people are going to elect to continue up the hill to their preferred destination, but here is where I’ll let you in on a bit of a secret. If you continue straight along the path, you’re going to find one of the best photo spots on the mountain, the Fireworks Viewing Platform. 

Continuing straight along the flat section of the path you’re going to come upon a covered rest area with public restrooms. What most people don’t realize is that if you keep following the path behind the rest area, you’ll find another trail that will take you to a small platform that has probably one of the best views of the city.

The trail to the platform doesn’t show up on Google Maps, so I’ve drawn a line to it on the map. You’ll see signage along the trail pointing in its direction, but the way they’ve blocked the trail with the rest area confuses a lot of people. Trust me, its there and its awesome!

  • Six Giant Rocks (六巨石)

The view from the popular Six Giant Rocks

The ‘Six Giant Rocks’ area is essentially the main destination for all of the tourists hiking this trail. This is the area where you’re going to get your ‘epic’ Instagram travel photos and also where you’re also going to have to line up with a bunch of fellow travelers all wanting the exact same photo. 

The area is aptly named for the six giant rocks that people climb on to take photos - The first rock you’ll meet as you walk up the stairs, which is coincidentally the smallest of the bunch is the main attraction. People are going to be waiting in line to take turns climbing up to the top of the rock to take their Instagram shots. This is because even though the rock is small, it towers over the peak which provides a unique perspective that makes you seem almost as tall as Taipei 101.

The best way to take photos here is to take turns taking photos with a fellow traveller so if you’re traveling with friends or family, you’re in luck. If you’re traveling solo, you’re going to want to ask another person waiting in line to help you take some photos. Don’t be shy, everyone has come here for the same reason, so make some friends while you’re there.

The reason that you’ll want to have someone else help take your photos is due to the fact that if you simply take a selfie while standing on the rock, you’re not really going to get the full perspective of just how awesome this spot is. If you have someone else helping, they can stand on one of the larger rocks to the real and take wide-angle shots that are so much better.

  • Six Giant Rocks Platform (六巨石觀景台)

Once you’ve finished taking photos at the Six Giant Rocks, you can continue walking along the trail where you’ll very quickly be met with yet another platform for taking photos. The ‘Six Giant Rocks Platform’ is another beautifully constructed elevated platform situated on a cliff and offers some pretty good views of the city. 

The platform has benches, so people like to stop here to enjoy the view and rest a bit. Unfortunately this means that if the mountain is busy on the day that you’re visiting that you’re going to have to wait to get a spot to take photos. 

While I do enjoy taking photos from this location, I don’t think its the best place to set up a tripod to take photos. The reason for this is because when others are walking on the platform, it shakes a bit, so if you’re taking long-exposures, you’re going to have quite a bit of ruined shot. You can however sit your camera on the rail to take some nice photos during the day, especially if you want to take multiple-exposure HDR shots of the cityscape.

  • Chaoran Pavillon (超然亭)

The Chaoran Pavillon is one of the most popular spots for local photographers.

The final photo spot tends to be the most popular one with local photographers, especially with those wanting to take photos of the cityscape at sunset. From the Six Giant Rocks area, it shouldn’t take you any longer than ten minutes to arrive at the pavilion, which thankfully doesn’t require you to walk up any more steep hills. 

While walking along the path you’ll come across a fork in the road with signage pointing that indicates the trail to Thumb Mountain (拇指山) is to the right and to the left you’ll find the pavilion. From there you’ll only have to walk for a minute or two before you arrive. 

The view from the pavilion is beautiful, but spaces fill up quickly, especially before sunset, so if you’re wanting to set up a tripod to take some cityscape photos, or night shots, you’ll probably want to arrive quite early to make sure you get a spot. 

Getting There 

In the past, hikers would have to walk from Xinyi District toward the mountain and (if they were anything like me) would invariably get lost or have to ask directions. All of those problems have been solved thanks to the addition of an MRT station near the trailhead. You can of course still walk to the mountain from the Xinyi area, but the easiest way to get there is by taking the Red Line (紅線) to Xiangshan Station (象山捷運站) and from there walking the short distance to the trailhead.

Something you’ll want to keep in mind is that not all trains go to Xiangshan Station as quite a few end their service at Da’an Station (大安站). Before getting on the train, make sure that it is one that goes all the way to Xiangshan, which is currently the terminal station for the red line.

Once you’ve reached the MRT station, take Exit 2 and walk through Xiangshan Park (象山公園) until you reach the end of the road. From there you’ll see signs directing you to turn left. When you’ve reached the top of the hill you’ll turn right and within a minute or two will arrive at the trailhead which is next to a temple.

If you want to grab some water or a snack before your hike, you’ll find a 7-11 and a Family Mart a short distance away from the park. Before you turn left to walk up the hill, turn right and walk down Xinyi Road to get to the convenience stores.

If you find yourself in the Xinyi (信義) area, you could also just as easily hop on a Youbike, ride to Xiangshan Park and then follow the directions above. 

Likewise, Xiangshan Station is serviced by buses 20, 32, 33, 37, 46, 88, 207, 612 and Red 10. 

If you want to take a bus and need info on bus stops or real time info, check the Taipei eBus website for more information. You may also want to download the “台北等公車” smart phone app which uses GPS to let you map your route more easily.  

While you’re in Taipei, there is certainly a lot for you to see and do, I’d suggest though that Elephant Mountain should be at the top of your list - Not only does it have arguably the best views in the city, it is also a quick and easy hike and is extremely accessible. You can also get some pretty epic travel photos while you’re there and best of all - its completely free. If you’re visiting Taipei and you’re not planning to visit the mountain, you’re certainly missing out on a great experience.